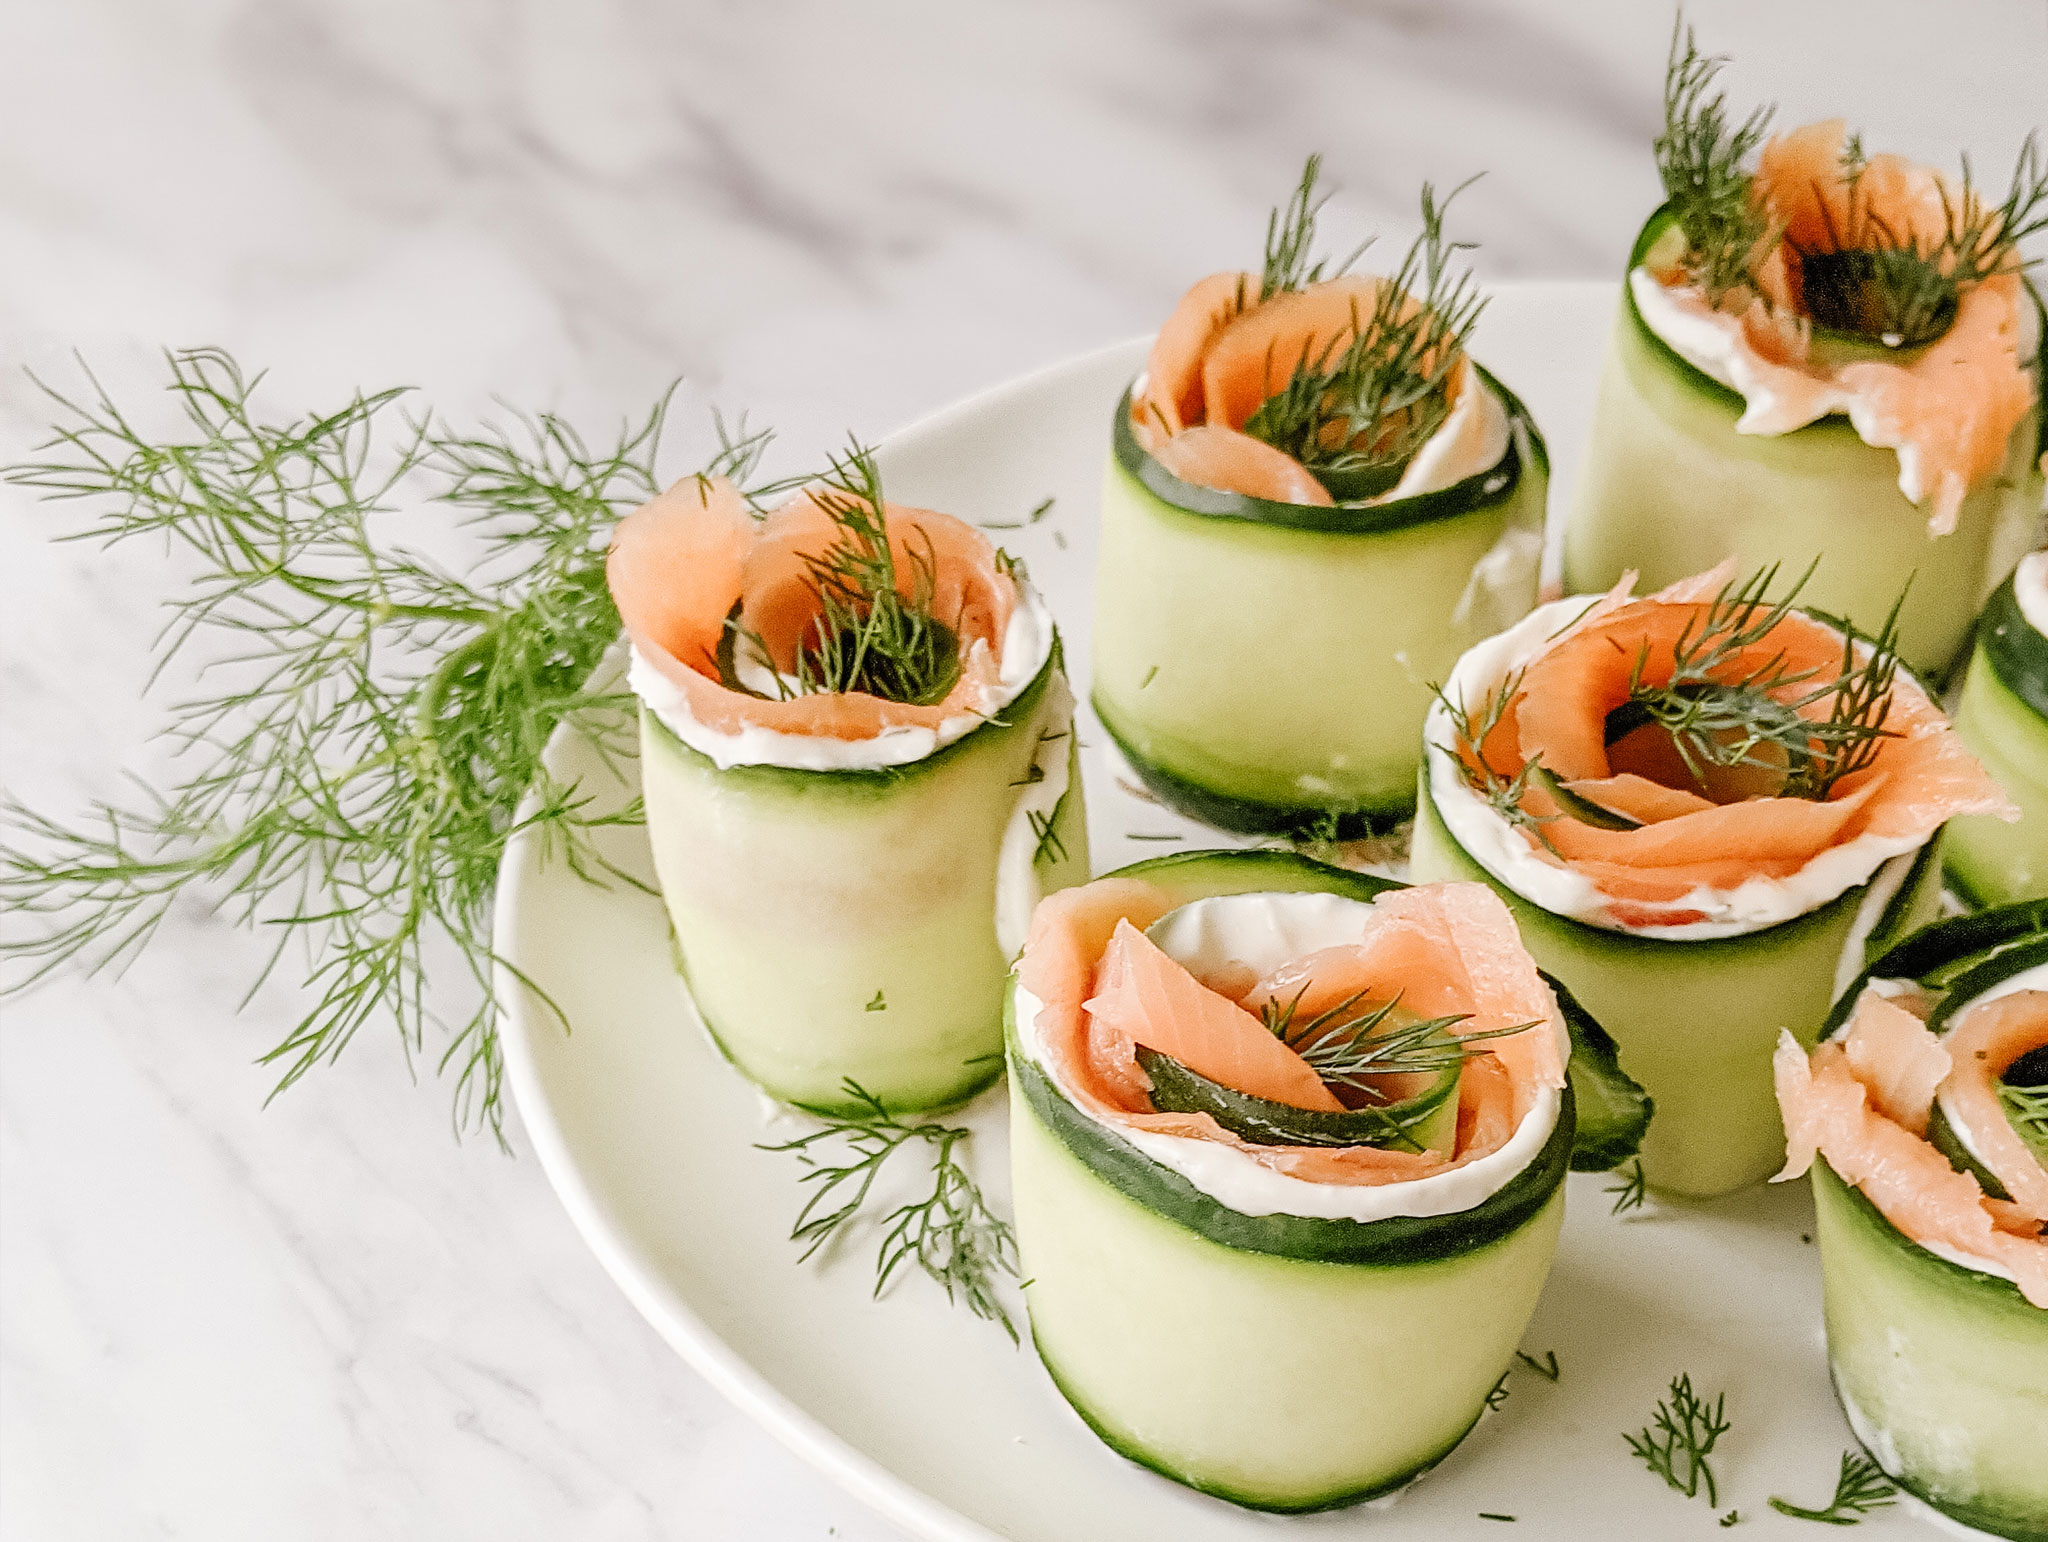
Beat the heat with these refreshing smoked salmon cucumber rolls! This no-cook appetizer is perfect for those hot summer days when you want something light and delicious.
These smoked salmon cucumber rolls not only offer a delightful combination of flavors and textures but also provide a satisfying crunch that adds to their appeal. The coolness of the cucumber, the creamy richness of the cheese, and the smoky essence of the salmon come together harmoniously, creating a tantalizing treat that is as visually pleasing as it is delicious. Whether you’re hosting a summer gathering or simply seeking a light and flavorful snack, these no-cook appetizers are a fantastic choice that will leave everyone wanting more. Elevate your culinary repertoire with these delightful rolls and savor the joys of effortless and refreshing dining.
Let’s dive into this easy recipe that will impress your guests and keep you cool. Here’s what you’ll need:
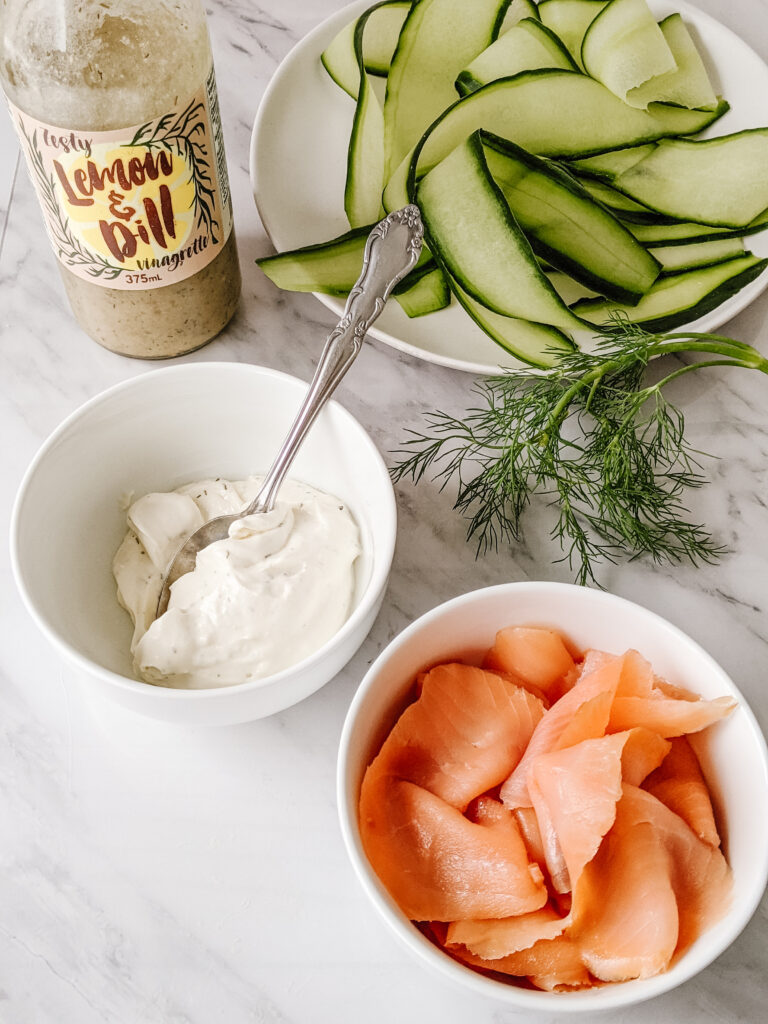
- 2 English cucumbers
- 8-12 ounces of smoked salmon
- 1 cup cream cheese, softened
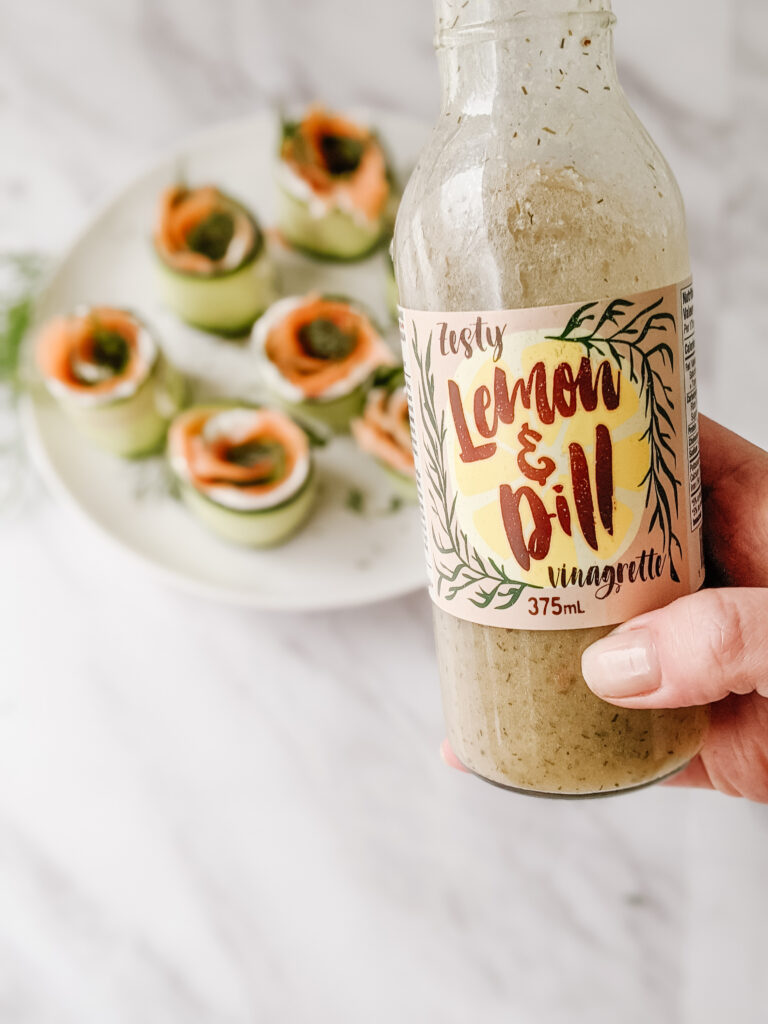
- 3 tablespoons Taste of the Okanagan Lemon Dill Vinaigrette (or more to taste)
- Fresh Dill to garnish
How to make Smoked Salmon Cucumber Rolls
1. Start by washing the cucumber thoroughly. Then, using a sharp knife or a mandoline slicer, cut thin, lengthwise slices of cucumber. Aim for slices that are about 1/8 inch thick and avoid the seedy center. These will serve as the “wrappers” for your rolls.
2. In a small bowl, mix the cream cheese with Taste of the Okanagan Lemon Dill Vinaigrette until well combined. Season with salt and pepper to taste. This mixture will add a burst of flavor to the rolls.
3. Lay out the cucumber slices on a clean surface. Pat them dry with a paper towel to remove excess moisture. This will help the cream cheese mixture stick better.
4. Spread a thin layer of the cream cheese mixture onto each cucumber slice. Make sure to cover the entire surface evenly.
5. Place a slice of smoked salmon on top of the cream cheese layer. If the salmon slices are too large, you can cut them to fit the cucumber slices.
6. Now, it’s time to roll up the cucumber slices. Start at one end and gently roll them up, keeping them as tight as possible without squishing the filling. Secure the end with a little bit of cream cheese mixture. Garnish with a sprig of fresh dill.
7. Repeat this process with the remaining cucumber slices, cream cheese mixture, and smoked salmon until you’ve used up all your ingredients.
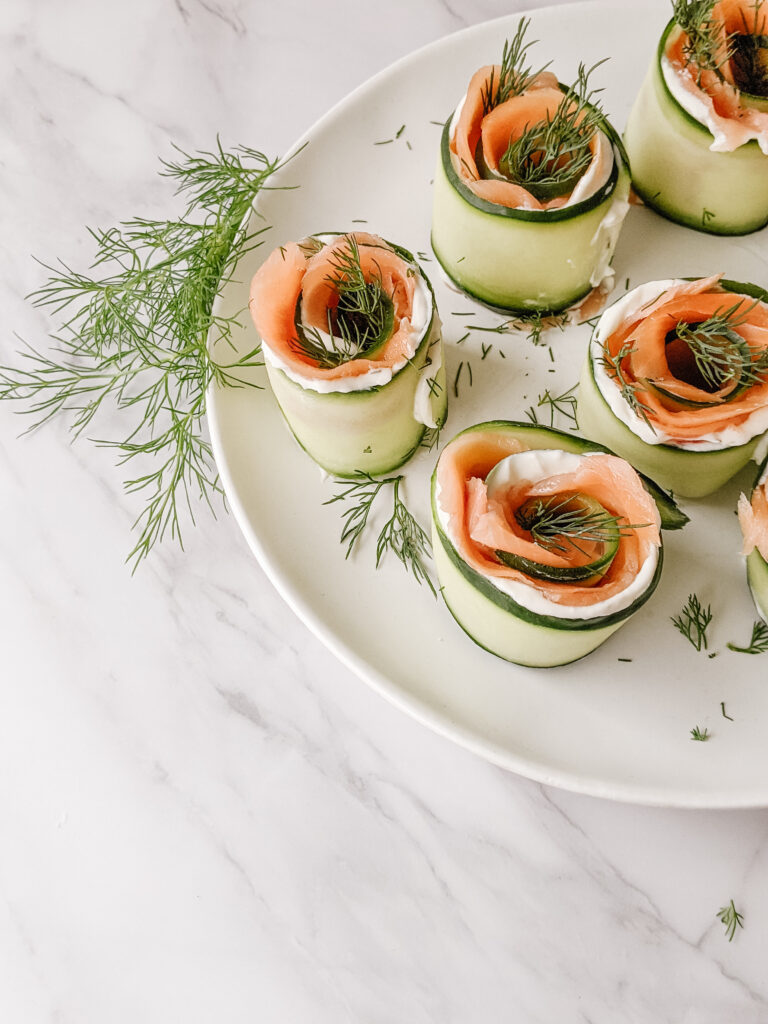
8. Serve your delicious appetizers chilled, accompanied by lemon wedges for an extra burst of citrusy flavor. The combination of cool cucumber, creamy cheese, and smoky salmon will surely delight your taste buds.
These smoked salmon cucumber rolls are not only a fantastic no-cook option for hot weather, but they also make an elegant and healthy appetizer for any occasion. Enjoy their refreshing taste and impress your friends and family with this simple yet stunning dish. Stay cool and bon appétit! 🍽️😊

Smoked Salmon Cucumber Rolls
Ingredients
- 2 Long English Cucumbers
- 8-10 oz smoked salmon
- 1 cup cream cheese, softened
- 3 tbsp Taste of the Okanagan Lemon Dill Vinaigrette (or more to taste)
- Fresh Dill to garnish
Instructions
- Start by washing the cucumber thoroughly. Then, using a sharp knife or a mandoline slicer, cut thin, lengthwise slices of cucumber. Aim for slices that are about 1/8 inch thick and avoid the seedy center. These will serve as the “wrappers” for your rolls.
- In a small bowl, mix the cream cheese with Taste of the Okanagan Lemon Dill Vinaigrette until well combined. Season with salt and pepper to taste. This mixture will add a burst of flavor to the rolls.
- Lay out the cucumber slices on a clean surface. Pat them dry with a paper towel to remove excess moisture. This will help the cream cheese mixture stick better.
- Spread a thin layer of the cream cheese mixture onto each cucumber slice. Make sure to cover the entire surface evenly.
- Place a slice of smoked salmon on top of the cream cheese layer. If the salmon slices are too large, you can cut them to fit the cucumber slices.
- Now, it’s time to roll up the cucumber slices. Start at one end and gently roll them up, keeping them as tight as possible without squishing the filling. Secure the end with a little bit of cream cheese mixture. Garnish with a sprig of fresh dill.
- Repeat this process with the remaining cucumber slices, cream cheese mixture, and smoked salmon until you’ve used up all your ingredients.
- Serve your delicious appetizers chilled, accompanied by lemon wedges for an extra burst of citrusy flavor. The combination of cool cucumber, creamy cheese, and smoky salmon will surely delight your taste buds.